Friday, December 27, 2013

Lime Green and Red Christmas Stockings (#59)

12 years ago, I bought a set of 6 matching stockings. At the time, I planned on having more than 4 kids, but six was all they had. So, they lasted us a long time. 
But, last Christmas I knew would be our last time using them since I was pregnant with baby #5. So, I bought some coordinating red and lime green fabrics, and planned to have them finished LONG before Christmas season rolled around this year. 
As you know, this year ended up not being anything at all like I had planned. 
Needless to say, these stockings were NOT done by Christmas Season. In fact, I finished them on Christmas Eve at 7:00 pm.
Just in the Nick of time!
My 6 year old was so worried that Santa wouldn't have anything to put out gifts in!
I hurried and hung them on the "ice cream parlor" Then she was concerned that they weren't hung on the fireplace mantel.... Santa will understand. We have too many to fit there now!

 You can see our tree in the mirror there, we decided to put it in the front room because with the super tall ceilings would could get a really tall tree. Ours is 10 feet and it is beautiful. So, I liked that I had something to hang the stockings on in the same room!
 Here's a few close-ups. I quilted the fronts of them after blanket stitching on the toe and heels. I did each cuff a little different, mixing and matching fabrics and trims. I also made these bigger than our last ones, they were kinda small, and once they had an orange and apple in them, you couldn't fit anything else.
We also didn't have our own names embroidered on the previous stockings, so it was lots of fun to not have to guess whose was whose.
And here they are in the daylight:

And yes, I did notice that they match my lamp shades!

Thursday, December 12, 2013

Satin Christmas Stockings (#58)


My husband and I have a lot of siblings.
A lot.
I am the 2nd of 7 kids.
He is the 2nd of 13 kids.
Yep, thirteen.
So, we don't give a gift to every single sibling, we do a gift exchange.
This year we had his younger brother who has 2 kids.
 I decided to make them stockings. I am also in the process of making a new set of stockings for my own family. For us, I am making them all out of cotton, and I am quilting them.
 But my sister-n-law is a little classier... and so I went in hunt of the right fabric for her. I loved this green:
 It reminded my of her wedding colors... which were pink, brown, and this green. (You can see the diaper cake I made in those colors here, and the quilt here)
 I thought that green, with the flowers and sequence might be too girly, so for the boys I found a satin red with fuzzy polka dots. I thought they coordinated ok when I added the ruffles in opposite colors.
I forgot how hard it is to work with this kind of fabric, and I am excited to be back working with cottons again! But over all I was happy with how they turned out! Kendra called yesterday to say that they had gotten them and that they were already hanging up!

Monday, November 4, 2013

Minion Trick-or-Treat Bags (#57)

 This year for Halloween, most of us went as Minions from the Movie "Despicable Me 2" I Made these treat bags for my little girls:

I used warm and natural batting to make them stiff so that they would stand up, and when they set them down on the ground, all their candy didn't spill out...

I appliqued the eye ball(s) and embroidered their names.
 Then I lined the inside with orange fabric.
I was happy with how they turned out, and so were my girls!
P.S. I also made the skirts... but a friend made the hats for me.
And now for the part where I confess (If you just came to see the bags, you can skip all this part!)
So, I have 5 kids. That's a lot. 
a. lot. 
And my house is too small. We've been trying to buy a bigger one, but that just hasn't worked out, but that's another story. Point is: Since we don't fit in our house, something has to give! So, we looked in the garage, and through the house to see what stuff we could give rid of. This is a hard process. 
Especially for me. But I am not a hoarder! wait! Are you throwing that away?!!? Nope, not at all.
But, I did spot out 6 huge boxes and totes full of costumes. 
Yep, SIX!
(Actually there were seven, plus a bag, but I didn't see those until today when I was putting the boxes of Halloween stuff back into the hoarders den garage)
I don't repeat costumes very often, so I decided that I could narrow that down to 1-2 boxes (which I did! But that is another story!)
So, as I was downsizing costumes, and Halloween decorations, and everything thing else, which I've already decided is going to be a long hard process, I got to those jack-o-lantern treat buckets. You know the ones. They are iconic trick-or-treat loot holders.
But they take up a lot of space in storage, they don't flatten down, and don't stack inside each other.
So, I gave them away when I was giving away costumes.
And that's when i decided to make these treat bags. Because they match their adorable costumes, and they will flatten down and store easily. And I decided that even though they are minions, they are "Halloweenish" enough to use every year.
And your reward, for reading this far?
You get to see my adorable baby in his yellow minion costume!
And one more thought while I'm confessing: As I was putting my now reduced boxes of costumes and Halloween stuff back into the garage, I started eyeing my boxes of Easter decorations... and especially the Easter Baskets, which also don't flatten or stack inside of each other, and I think I'm going to say good-bye to those and make a squattier, fatter version of these treat bags to be our Easter baskets... then they could each have the kids names on them, and be personalized, and- best part- not take up so much room in the garage!

Thursday, June 27, 2013

A Personalized Pendant Banner and Pillowcase (#55 & #56)

Here is the Pendant Banner with my little guy's name on it! 


I made it using fabrics that I already had on hand. Below is a picture of the process- a little bit- I should have taken it sooner, because I wanted to show the process of how I decided to do it, by laying out the fabrics, threads, etc.

 I did some letters applique and some are embroidered, all of them are in different fonts.


See that rocking chair? I want to paint it the color of the quilt hanging over it! won't that be fun? BTW the quilt was my husbands when he was a baby, isn't it funny how things come back around? Lime green and ric rac? Totally in again!

Confession:  I hung it on the crib to take a pic of the backside (all done in the turquoise polka dot) and realized there should have been 6 pendants... yep, I totally left one off!

Now, I realize that I don't do tutorials (c'mon, I have 5 kids, I'm lucky if I ever have time to take a shower!)  But I do give tips!!!

TIP: First of all, I didn't come up with this idea myself, I saw it years ago, before Pinterest, so I can't even give this person credit or link you back to their blog... sorry.
But, you know how when you buy a set of sheets at Target, they come packaged in a little packet made out of the same material? Don't throw those away! Use them for a pendant banner, and it will automatically match the bedding! (That's what the "A" above is sewn onto)
 And here is the pillow case I also made:
 It's also made from the crib sheet packet and scraps I had in the color scheme.
I remember Vern Yip saying that he didn't really like to do Theme Rooms except in kids bedrooms (I think he said that while doing a transportation themed kids room on Trading Spaces- the one where he had a train going all around the room- it was cool!)
And I completely agree- kids rooms are a great place to do themes... but I admit, I'm very hesitant to do that. Why? Cause kids grow up so fast, and even if you have the money to be redoing their room all the time, it's still a lot of time and work. I think I prefer to do color schemes instead of themes because they grow with the child a lot easier and give you more flexibility.
You can see my oldest son's rooms color scheme here. It is classic red and navy. I made his first quilt when he was 3, and he's still using it (he's almost 13!)
So, for this little boy, I chose turquoise and lime green with pops of orange, black, and white. I think it should grow with him too.
Oh, and one more adorable picture- wait for it, wait for it...


Aww, every mother knows there's nothing sweeter than a sleeping baby.

Thursday, June 20, 2013

Card Making- aka what to do after surgery

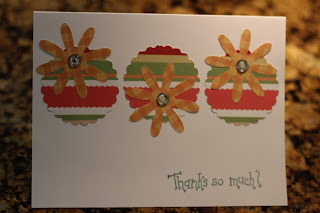
 So, last week I had surgery (very boring- read on!) and with the "down time" I thought I would make some "Thank- You" cards...
 To give to all those people who have given us gifts, or helped us out with the birth of our new baby boy, and the surgery....
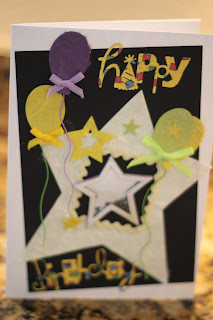
 I also made a few birthday cards and Birthday gift tags, because with 5 kids, my kids go to a lot of Birthday parties, and we've run out of cards. And I don't want to spend money on the card- I want to spend it on the gift!
 Plus, I was getting bored of "Thank You" cards and had to mix it up a bit...

 I ended up making a total of 48 cards. That might seem like a lot... but we know a lot of generous people... so actually I hope I don't run out soon!
 I went to my scrap booking stash. Because we all know I'm not going to ever actually finish the scrapbooks I bought all those supplies for- not with those digital scrapbooks around!
 So, I just worked on cards until I ran out of the ribbons, or paper, or brads, or whatever I was using, and then moved onto something else.
 It was fun, but it took me 3 days, and even with the 4 oldest kids at Grandma's house (which was the only reason I could even drag out the paper and leave it all out for 3 days without worrying that it was going to get destroyed, or had to be all cleaned up so we could eat meals in the kitchen!) I wanted the mess gone, and my kitchen back...
 So I put it all away and hope that I have enough cards to last for awhile.
 Plus I ran out of envelopes...
 I liked this card better without the baby foot/hand prints...
 I really don't have anything else to say, but I figured if you were still with me this far, we should keep the conversation going.

 I either took a lot of pictures, or made a lot of cards... or both...


 No wonder this took 3 days?!?!?

That's all, you made it! Whew! (Now I need to write in all those cards... man, I need a nap!)

Friday, May 3, 2013

A Cell Cake


 So I guess here in Texas, 6th grade science students are assigned to make a 3-D model of a cell. An edible 3-D model of a cell. It can be either a plant or animal cell. My son chose to make a cake, including fondant.
 I had to keep telling him to make the fondant pieces smaller so they would actually fit in our little, tiny ball cake. But, I think in the end he did a great job.

I'm happy to report, that I also actually remember some of the names of the parts of a cell from when I took science... just a few years ago.
I drove him to school, which I don't normally do, so that his cake would arrive unharmed. That may have been a mistake, since he ended up getting there early, and after turning in his cake, decided to go outside and play soccer with some other kids until school started...
He got tripped playing soccer, and broke both his arm bones (which I believe are the Ulna and the Radius- see I remember lots of things from science!) and now is in a cast and can't play soccer at all.... So this smug little smile you see below?- that was the last time he smiled all day... even after the morphine kicked in at the ER...  As much work as the cake was, I wish it had fallen and gotten broken instead...

UPDATE: 5/3/13 3:52 PM
MY SON INFORMED ME THAT HIS CAKE WAS VOTED MOST ATTRACTIVE! THAT MEANS THAT HE GETS EXTRA CREDIT! AND TO THINK WE WERE GOING TO TRY AND WIN MOST DISGUSTING AT ONE POINT! THERE WERE 3 AWARDS: MOST ATTRACTIVE, MOST ACCURATE, AND MOST DISGUSTING!

Thursday, April 4, 2013

Car Seat Make-Over #54

So I had this car seat from my last baby:
Obviously, my last baby was a girl. Actually my last 3 babies have been girls... So, we saw no risk at all in buying a pink car seat. 
Then I got pregnant, and believe it or not, this baby is going to be a boy!!! (1 week from today he will be born!)... so I've had a lot of making over to do. Our playroom is decidedly pink. We aren't changing that. Sorry, kiddo. I can't tell you how many little boys have come over to my house and played with our pink kitchen and not minded at all! 
But, I didn't want to bring my baby boy home (and all around town) in a pink car seat. But, I also didn't want to buy a new one, since this is only 2 years old. I understand car seats are supposed to be safe for 5 years, and I didn't want to spend money on a new one if I didn't have to.
So, I asked some friends, who recommended buying a new cover for it on Etsy.
The least expensive ones were about $80.00. 
Not quite the cost of a new car seat, but still pricey.
Then, I googled tutorials just for fun, and found this awesome tutorial.
So, I decided it was worth a try to do it myself.
I spent only $13.87 on fabric at Hobby Lobby (thanks to 30% off sales and a 40% off coupon)
and ended up with this:
I see no need to reinvent the wheel by doing my own tutorial when there is already such a great one out there, but I will share with you a few tips I learned while I did it.

Take lots, and lots, and lots, and lots of pictures
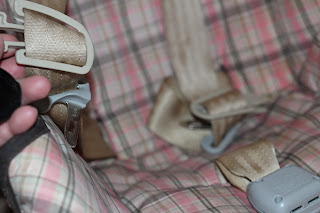
Including pictures of how the straps all go back together.
even though both my carseat, and the one from the tutorial were both Gracos, they were really different.
So, take pictures of everything
I'm glad I took pictures of these darts, they were a little bit of a challenge:
But I got it to work:
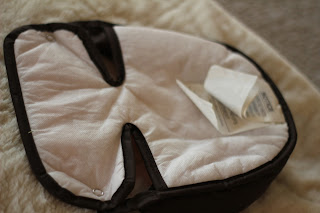
And take pictures of each step as you unpick it:
If I had actually referred to my pictures more, I would have saved myself a lot of extra work when it came time to put the binding on...
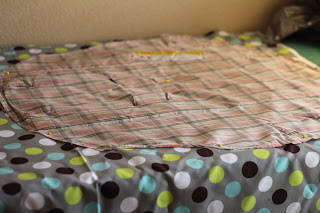
Also, unpick carefully so you have an accurate template for the pattern.

I was better about looking at the pictures while making the canopy, and saved myself from a lot of frustration...
One thing I wanted to do was make it cute and unique. The tutorial I referred to was being made for a girl, and she put these adorable silk flowers on the top of the canopy.... It took me awhile to come up with an idea that was not girly (still getting my brain to shift gears) and finally decided to applique his initial on the top.
 I love how it turned out, and I love how it's still a Z from the other direction!
 I also made the new born head rest, again by unpicking the old one and using it for a pattern. (I don't think this was on the tutorial, but by this time I was a pro!)

And I used some strap covers from a friend to make the strap covers. 
I had barely enough of the polka dot and squiggly lined fabric, but plenty of the brown minky.
 I spent about 3-4 days working on this, so lots of hours, but it wasn't too hard, and I was so excited about how cute each step was turning out, it really kept me motivated!
 Plus, being so close to my due date... well, that probably kept me motivated as well.... 

 My biggest tip is to just enjoy how cute it turns out! 
Once again, here it is before:
And here is the after: 

What do you think?