Saturday, July 28, 2012

Avenger's Cake


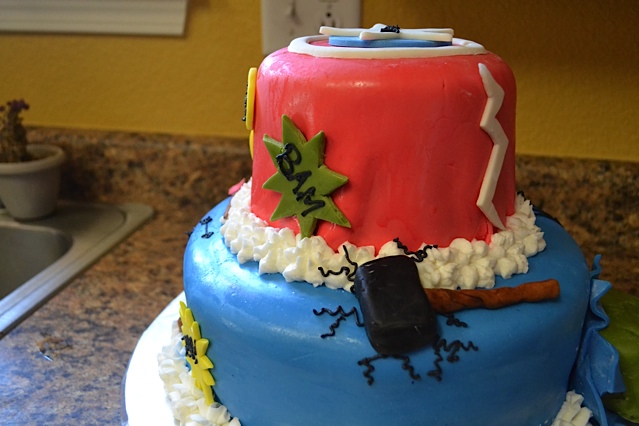
My friend's son just turned 8. He had an Avenger's themed birthday party, and I helped make the cake.
Well, actually, I ended up taking over the whole thing. We were going to make it together, and then schedules got crazy... she didn't mind, though, and Isaac was happy with it.
 I haven't seen the movie yet, so I asked for a list of characters I needed to include. I have seen Captain America, so that was the easiest one to do.

 His mom told me that his favorite character was Hawk-eye, , so we needed to include bows and arrows.


 Also, another character I wasn't familiar with was a black window spider lady??... So I made a black widow out of fondant and piped on a web. Hope that was close enough...
 Thor's hammer was relatively easy (I've seen that movie, too, although I don't remember it very well)
 Love this view from the top
 More close-ups of Thor's hammer...

 I hope you can tell that that's the Incredible Hulk's fist smashing out of the cake
Confession: I got all character's represented except Iron Man... oops! Too late now!

Wednesday, July 25, 2012

Strawberry Shortcake Costume (#41)


 I know it's still July, but we are already talking about Halloween Costumes here. I know... we're such nerds. But it made me remember that I NEVER finished this post from last year!!! So, I decided it was time!


In September, when my daughter decided on her Halloween costume (yes, we decide early in this family- we are serious about our Halloween costumes!) she wanted to be Strawberry Shortcake, I was a little surprised. I wasn't sure she even knew who Strawberry Shortcake was. When I looked into buying the costume on-line, I was surprised to see costumes like the girl on the right. Not to age myself, but I thought she was supposed to look like the girl on the left.
A little research taught me that she started out that way, and has progressed to the girl you see on the right. Skinny, pink long-haired princess of Berry-land. While I wished she had remained true to her homely-looking roots with red hair and freckles, I was at least glad to see the return of the green and white striped tights.
What I realized after my short investigation, was that because she has taken on a few different looks, I had a lot of freedom in how we made the costume. Whew!
So, when I saw a red dress with pink polka dots [the current SS has pink dress with red polka dots] on clearance at Target for $8.00. I decided "close enough")
I borrowed a pattern for an apron, and added some applique strawberries on it. The hat was a little bit of a challenge since I had no pattern to follow. I wasn't too happy with it, and was going to redo it, but ran out of time. And my daughter thought it was great- so hey, why bother?
The tights I messed up on by not soaking in water after I had put on the rubber bands to make the white rings. You should do this before putting it in the green dye to get more distinctive rings. But, it was close enough...
I was probably happiest with the treat bucket. I had found it on clearance for 25 cents because it  was missing the handle. It wasn't a typical round pumpkin. It was a caldron, and smaller at the bottom, so I thought it was perfect- it was more strawberry shaped! I simply placed it in the middle of the fabric, pulled it up to make sure it covered the whole pail, then cut it in a circle and sewed a casing for elastic in it. Then I made the leaves and hand sewed them on. Oh, and I also made the handle.
Wow, that was a terrible description- good thing this is not a blog with tutorials! Ha ha!
Then, all I had to do was spray paint her hair pink, and rosy up her cheeks and add freckles.
Look how happy she is!


Somewhat Simple
linked to:
http://shabbynest.blogspot.com/

Thursday, May 3, 2012

March's Finished Project (#39) A Baby Quilt


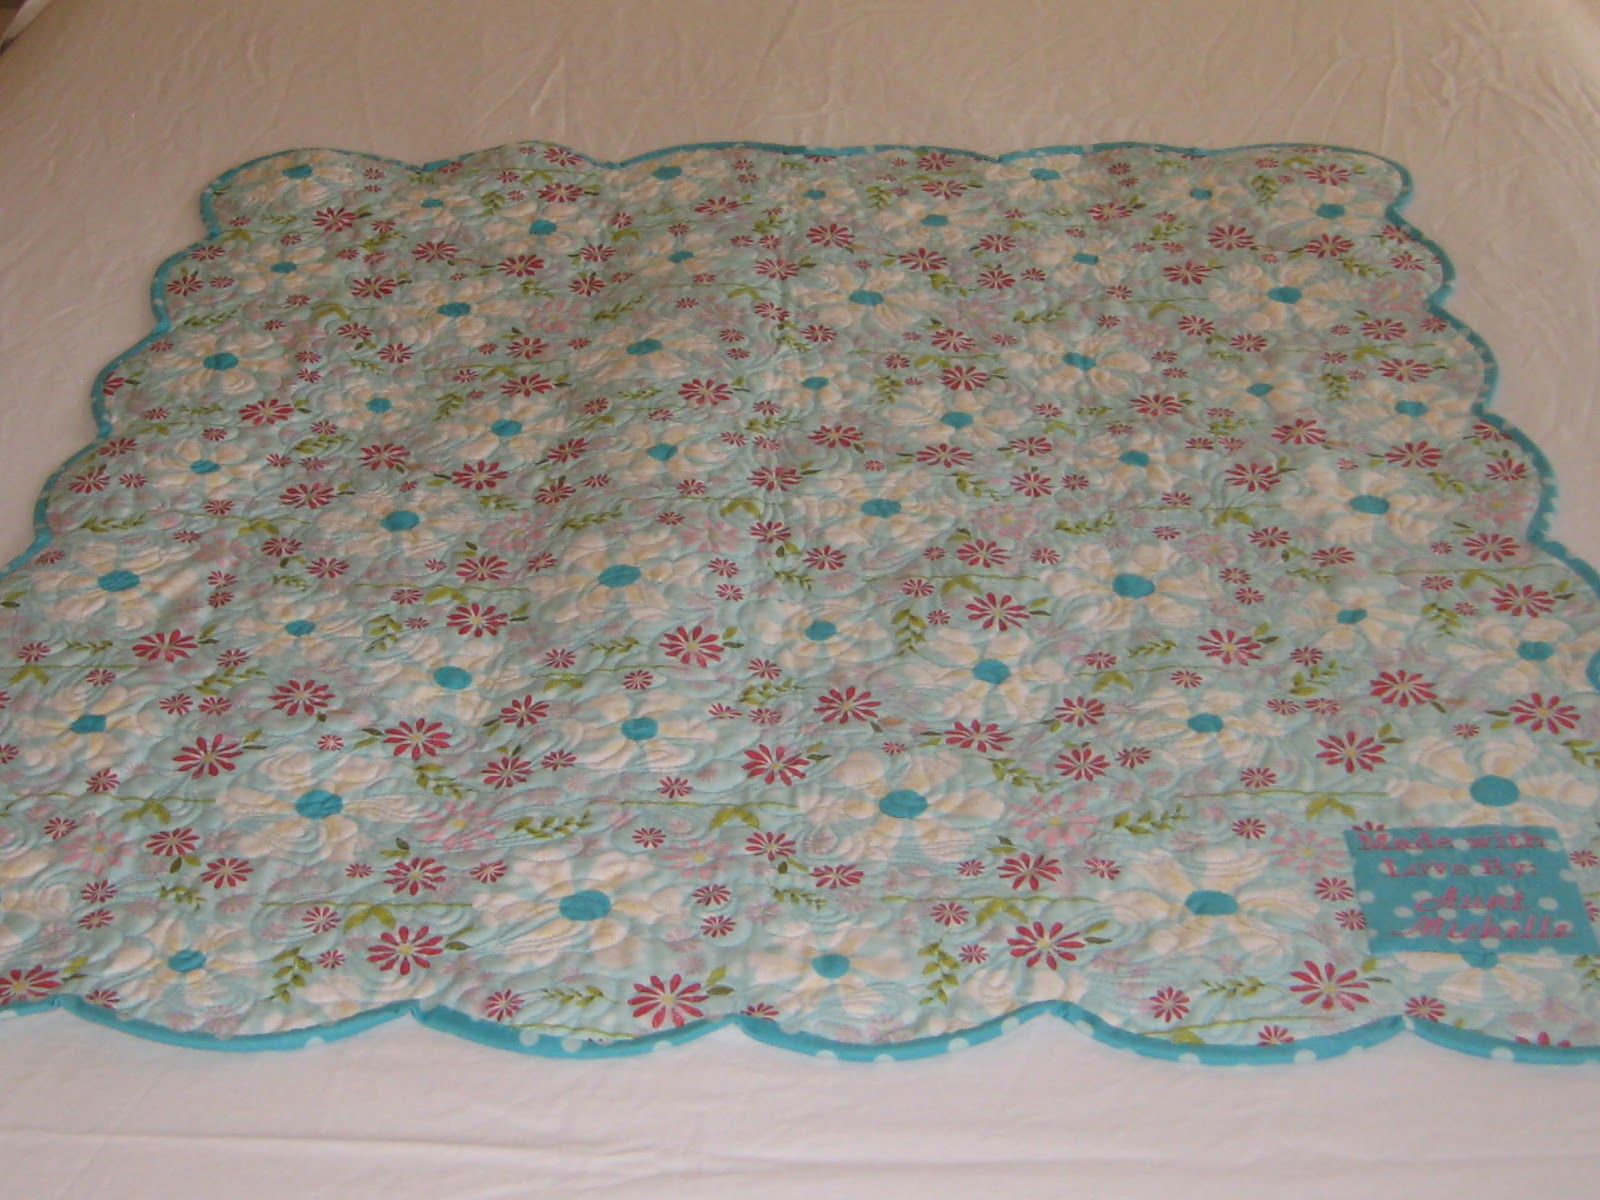
 After the closet clean out, I decided to finish this quilt. I had bought the fabric a while back as a charm pack. It was designed by my friend Amanda Herring. (You should totally check out her blog- she has some adorable patterns and fabric!) I loved the fabric so much, I didn't want to cut into it at all. So I just sewed the blocks together.
 Then added some jumbo rick rack and a white border. I decided that this would be for my niece who is due to be born June 5th! So of course it got her name. (Don't you love her name?!)
Amanda sent me some more fabric for the backing and binding. They are probably some of my favorites!

 I did a scalloped edge with the turquoise polka dot fabric for binding. And also added a personalized label.
 I love how it turned out, and I hope my sister-n-law and niece, Charlotte love it, too!


Monday, April 30, 2012

Closet Cleaning


Ever since we moved into our house (which was August of 2010) I have had almost all of my sewing and craft and quilt things SHOVED into the hall linen closet. I was scared to open it. Things could fall out and hurt you. It was nearly impossible to find anything.
It was so bad, I was too embarrassed to take a before picture of the closet.
One day I decided to clean it all out. That meant emptying every single shelf. This was not a project I could tackle myself, so I had the help of two friends. After it was all emptied, I sorted through my stashes of fabric and other things. If I had fabric that did not have a specific project intended for it, it went into the get-rid-of pile. That get-rid-of pile turned into 6 bags of stuff.
I gave away my serger because I had no room to set it up and actually use it. It went to a good home, my friend Maria will use it. I was happy she was so excited to get it. She immediately took it in to get serviced, and has started using it. I have no regrets about giving it away. Well, I guess I have one regret: Maria moved across the country...
 Here is the mess at the end of day 1:
The stuff I kept was all organized into Ziplock bags. (Did you know that they have these really cool ones that are 2 gallon size, and hold most quilting projects? Glad makes one that is 2.5 gallons. They are awesome.) Each project was put in a bag with the pattern, and all the fabric and notions to complete it. Those went back into the closet.
 

 I made a list of all of those bags of projects. There were 25. So, that means about 1 project a month for the next 2 years, and if it's not done in 2 years... well, then it probably won't get done at all and will have the same fate as those random things in those 6 bags...
But look how organized my closet is now:I even had room to put things like sheets and towels in it- like a real linen closet! The best news is: I finished the project for March! I haven't posted it yet, because it is currently being shipped to my sister-n-law and I wanted her to see it in person before she sees it on the blog!

Wednesday, April 4, 2012

March Comes In Like a Lion...


I saw these little lamb cupcakes on Pinterest, and decided that the would be a good kids project. I have a niece with a St. Patrick's Day birthday, and so my kids and nieces and I made these. The kids loved putting the marshmallows all over them. The ones on Pinterest used chocolate to make the face and ears. I had leftover black fondant, that was even easier, and the kids loved doing it.


We also made some green cookies. I told the kids we were doing March desserts, "because, March comes in like a lion, and goes out like a what?"

"A sheep?"

"No, a lamb. In like a lion, out like a lamb."

"What does that mean?"

"Umm..."

Well, I may not be able to answer all their questions, but we had a fun party anyway.
confession: my camera is getting worse everyday. I was trying to get a picture of the 8 I made in black fondant for a topper...

I don't know what they're teaching in schools these days, but I have a sneaking suspicion that these kids also don't know what April Showers bring...

Monday, April 2, 2012

Corner Cabinet #38

LinkSo I bought this old corner cabinet at an estate sale just before we moved. I'm not sure what I was thinking... but I'm glad I did. Besides making an awesome Vanishing Cupboard for our Hogwarts Party, I really thought it would be great in our teeny tiny playroom loft for holding all the toys.
But, it mostly sat in our garage for months and months.... here it is with some cute kids I also found in my garage:

Then my husband took it on for the Thanksgiving and Christmas Holidays... and made it into this:
He added beaded board to the door inserts, new crown molding at the top (he is getting really good at crown molding... I'm resisting the urge to put it into my little girls bedroom...) we added a crystal door pull, painted it white, and viola! After some serious purging, it pretty much holds all the toys that don't go in the toy kitchen.
It even inspired me to hang pictures, a magnet board for my daughters drawings, and something to hang dress-ups on on the wall. Sorry the pictures aren't good. It's so tight (small) in this little loft, I couldn't get back far enough to get a good full picture!

Wednesday, March 28, 2012

Brand New Furniture for the price of a can of Stain

note: Gonna call the 1st end table project #37...

So we have this pine furniture that we bought almost 12 years ago. We loved it. So much that we bought: a hutch, a TV Ar moire, 2 side bookcases for it, 2 end table, and a book case. All matching, in the same light colored pine. It's been completely functional, and we've loved it. Until we moved into this house, and it just wasn't working anymore.
It was better after we got rid of our old couches, but still wasn't working.
We even moved the hutch to the garage, and considered selling it on Craig's List. Then I saw on someone's blog that they had a front door to their house that looked just like our furniture, and they had stained it a dark espresso color. It looked awesome. I showed the pictures to my husband, and we decided that it would be worth trying. So, I decided to try it on one of the end tables. They were the smallest, cheapest, and most expendable, in case it didn't work...
And although my photos are terrible, it did work, and it looks awesome! So, I am now in the process of doing the other end table and the hutch, and we are planning on doing it to all of the furniture- so stayed tuned as I reveal the before and after photos on all of those.
I'm even considering doing the dining room table.
I am trying to figure out the best protective finish to put on them. I'm going to try Minwax finishing paste, that's what another furniture blogger recommended, but I know I'll need something more heavy duty for the table- something that will hold up to daily spills, water, etc. What do you recommend?