Tuesday, August 3, 2010

Project #8 -Old desk made new


Don't worry, it's the before picture. I picked up this baby for $45. The catch was it was in an upstairs loft office of a big warehouse, and my husband and his friend had to figure out how to get it down. I think it involved a makeshift ramp and lots of rope. Yes, he really loves me.
And that thing is HEAVY!
But, it was big (check), had lots of drawers (check) and fabulous lines from the molding to really give it some pretty character (check)

Here it is before I finished the drawers:

Here is the front: I love that it's not all flat.
And here you can see it with the new hardware (I need to find a new lock to go in the middle drawer)
So, tell me what you think. Unless you don't like it, then you can just tell me you are proud of me for getting it finished!

Thursday, July 22, 2010

Wondering where I've been? (And project #7 )


Well, this should give you a clue as to why I haven't been posting (or finishing projects) like I should:

Still haven't guessed, let's try it from this angle:

Yep, I'm pregnant. Hard to believe from my HUGE stomach, but I am a mere 4 months along. But that means that the last few months I have been sick as a dog. Actually, I've never seen a dog as sick as I was. I was SICK!

On top of that, we are moving out of state! So, in between my trips to the bathroom to puke, I have been frantically packing boxes and getting my house ready to sell. It hasn't been the most enjoyable time of my life.

I am proud to say that in the midst of all this chaos- I did finish up some huge projects.
I think you should see some before pictures:

This beauty was part of an estate sale. Not an auction- a family member was storing everything in a big building and selling things off via Craig's List and word of mouth. They called this the "Ice Cream Parlor" because it had originally been behind the counter of an ice cream bar. It was HUGE! It was in 2 pieces. The bottom part that you can see above was six cabinets and 6 drawers (can we say "yeah for storage!") and the top part was a beautifully framed mirror that reminded me of an antique mantle. It had obviously been in storage for years, as it was covered with dust, but I had a pretty good imagination and thought it could look wonderful!
But... they wanted $1,000.00 for it.
So, I waited a year. Yep, a whole year. I was pretty confident that not a lot of other people would be interested in such a big piece (It is 10 feet long and over 8 feet high), so I waited. A year later they were only asking $400. Still, I wasn't sure, because I was trying to be more realistic about undertaking so many projects- and this would be a huge one.
So one night in February, my husband and I went shopping for a dresser for our son, who, at age 10, has clothes that are too big to fit the dresser we painted for him when I was pregnant with him. We looked at every furniture store in town (we have about 6).
We couldn't find anything under $500, and nothing that was solid wood, and well made. In fact, I couldn't even find one where all the drawers opened and closed like they should! (We came up with a super fun solution to his dresser problem, but it's not finished yet, so I will wait to post about it!)
When we finally went to dinner, I told my husband, "Well, one thing's for sure, after looking at what there is in new furniture, I am totally convinced that I want to buy that ice cream parlor thing!"
He just smiled and said, "Happy Valentine's Day" He'd already called the guy and was picking it up that weekend.

In spite of some cracked and missing molding (which we could not match- they don't make it the same anymore, so we had to buy new) there was some beautiful details.

Like this:

which has a place to put a light fixture, if I could just figure out what would look right there.
And these hand carved drawer pulls:

We also added beaded board (Cause it's my fave!) to the inside of the doors:
The real drama was that I didn't measure right. I thought it was 7 feet. It was 8 feet, 2 inches. Our ceilings are 8 feet.
After much heated debate- my husband wanted to cut 3 inches off the top, which I was sure would throw off the proportions of the mantle thing around the mirror, I wanted to cut it off the bottom.
I was definitely right.
While I wished I could have left the substantial looking 6 inch baseboards, I wasn't gonna mess around with that gorgeous mirror.
Here is it again: (sigh)
And while it's NOT included with the house, we think it will still wow potential buyers (if we could just get them through the door...)
And I can't tell you how happy I am to have it done, and with how it turned out!

(Later this week, I will show the before and after pictures of the desk in front of it!)

Linked to:
Mustard Seed Creations
http://www.missmustardseed.com/wp-content/uploads/2009/10/furniture-feature-fridays-copy.png

Saturday, May 8, 2010

Candy Bar Cakes for Teachers

I got a great idea for an easy "cake" over at Your Home Based Parties I wanted to make one ever since I saw them, and decided that they would be perfect for Teacher Appreciation week. Then it snuck up on me, and Thursday night I realized I hadn't done them yet! So, I stayed up a little late, didn't have quite as many big candy bars as I needed (I stacked little ones instead) and had to use tomato cans from dinner, but I thought they turned out alright.
To see some really cute ones, check here.
I just had to include these, since it seems like I'm not getting any projects done. The truth is, I'm working on some BIG projects right now (just stopped painting in the garage to grab a snack and jump on the blog for a minute), and I'm hoping to post those soon. I AM making progress!!!

Thursday, April 29, 2010

How To Make A Bridal Cake

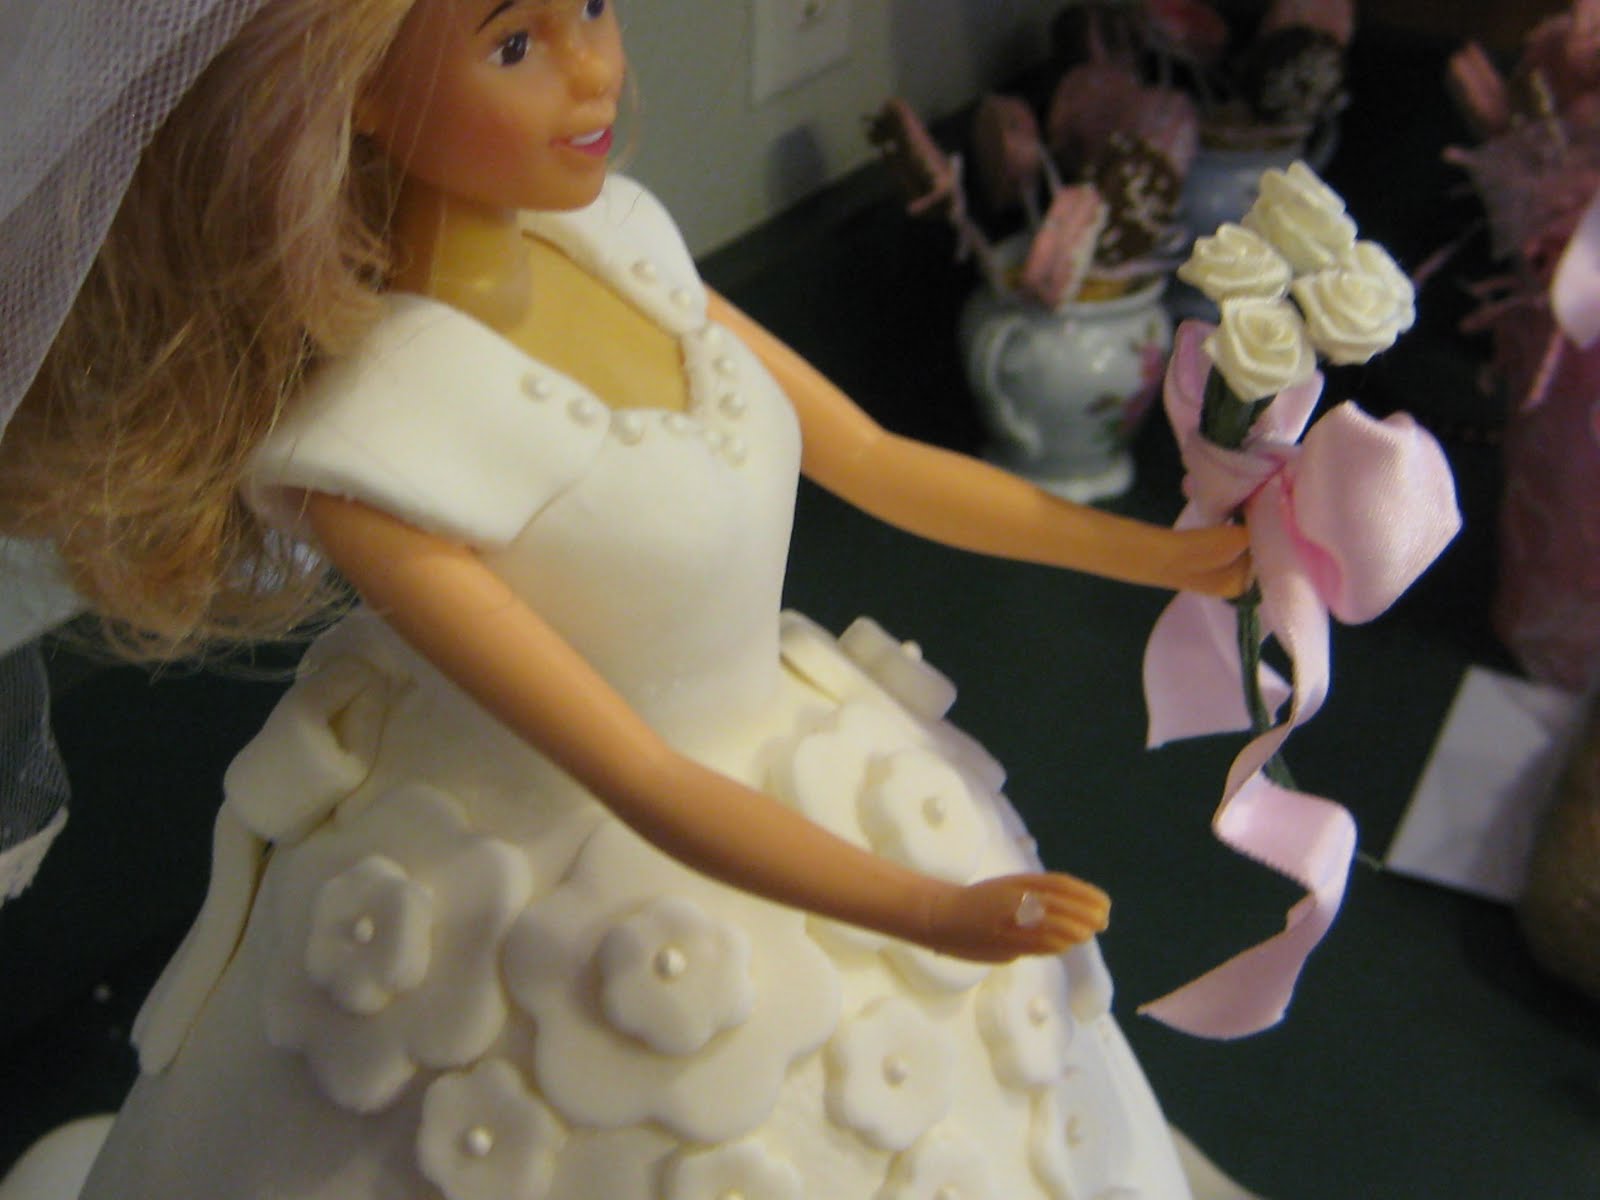
Remember this Bridal cake?

Well, like I said, I'm not much good at tutorials, but I will tell you how I made it, and pass along any tips I've learned along the way.

This is the first doll cake I ever made:
It was for my daughter's birthday a few years ago. Before I ever took any classes, or started dabbling in fondant.
I asked a friend who had just made one for her daughters birthday if she would help me out. She introduced me to using rice crispy treats in cakes (one of the best kept secrets out there!) Yep, this cake was made out of Rice Crispy treats!
I made cupcakes to go with it, (that she got to decorate) so there was some cake involved:
[Tips: I don't have the doll cake pan: I used my Pampered Chef batter bowl. Works perfect, but you need to add something at the top, or it doesn't quite go up to her waist. (Try rice crispy treats, fondant, frosting, whatever works)]

I was feeling more confident this time, and baked an actual cake.
[Tip: to make sure it cooked evenly, I put a metal skewer in the middle of it. Don't know why this works, but is supposed to be helpful on large or deep cakes to ensure more even baking.]

However, as I was trying to level it, I ended up cutting off way too much!
So, out came the butter, marshmallows, and Rice Crispies!
You can see where I added it at the top and bottom to give the doll more height. (Chocolate cake in the middle)
Then I covered it with a crumb coat of frosting (with help from my 2-year old) and refrigerated it for a few hours.
Then I made my fondant, and put Barbie in. For my first doll cake, I just used a knock-off Barbie that I got at the Dollar Store. This time I splurged- spent the other $2.50 for the cake pick.
[Tip: Splurge! I had heard horror stories of people going to put the Barbie in and having the whole cake fall apart.]
I had made a veil out of tule and some lace that I attached
[Tip: put this on last! I don't know what I was thinking?!? I had to have my daughter hold the veil out of the way while I put the fondant on- of course, she would have had to hold her hair out of the way anyway- but I wouldn't have had to worry about messing up the veil!]

My fondant ended up being very sticky!
[Tip: roll out small pieces to test if it is too sticky- nothing more frustrating than rolling out enough to cover the whole skirt part, just to find out it is stuck to the counter still! Oh, and be sure to take Barbie out while you put the skirt fondant on!]
It took me a few tries, but I eventually wrapped some fondant around her bodice. I overlapped it in the back, and wet it to get it to stay. My first few attempts didn't work, and she almost ended up with a butter cream frosting bodice instead! Then I added the sleeves...I decided to make a bow to put on the back to cover where the fondant overlapped. I thought it turned out nice.

Then I wasn't sure what I was going to do... My original plan was to put butter cream frosting flowers on it. But, then I remembered that I had bought these flower fondant cutters, and thought I would try them out.
I put some along the bottom, and then decided to try it at the waist. I probably should have just put the smaller size flowers at the waist, but I thought it was O.K. I added some cake gems to the middle of the flowers, and also along her neck line.
If you scroll back up, you can see a close up of the sugar crystal I put on her ring finger (please try not to point out that it's on the wrong hand! Didn't realize until too late!)
We also gave her a bouquet of flowers tied with pink ribbon and added some more lace to where her veil attached to her hair.


I thought she turned out lovely and really made the table spread look pretty.

So there she is, my 2nd doll cake, and my first Bride!
(Please feel free to ask any questions in the comment field, and I will try to answer them!)

Monday, April 26, 2010

Bridal Shower and Brides Cake

This past Saturday, I threw a Bridal shower for a girl from my church, and I thought it would be fun to show you the food buffet and and the cake I made.
These pops are just Oreos with a stick in them, then dipped in Chocolate and then we added some sprinkles and chocolate drizzles.

They were so easy, my 8 year old daughter helped me make them.
I am always looking for an excuse to use my rose dishes that my mother-n-law gave me. This was a perfect opportunity.


The silverware was our one and only splurge when we got married. We used all our gift cards for very practical things. Needs only. But these were on a super good sale, and so pretty, and we had the gift cards... my husband relented on the condition that I used them. So, I try to every chance I can. They cannot be put in the dish washer, and occasionally require some silver polish, but I have no regrets about getting them!!! Putting them in the jars with bows was a last minute thought that I really ended up liking.
Our color scheme was obviously pink. (To go with my rose dishes)
A friend who helped me, gathered up pink colored candies and cookies.
I made the cake. I was so happy with how it turned out. I have done one other doll cake, for my daughter's birthday, but never thought of doing it as a bride. Then I googled bridal shower cakes and saw one, and thought it would be really cute and fun.

I've been doing so much butter cream, after taking the Wilton Cake classes, that I haven't done fondant in a long time... I thought I would do this one in fondant. I am self taught, so it is far from professional, bit I still loved how it turned out. It really became the focal point of the food and the decor.
Here is the bride-to-be with the cake. Later in the week I will try to do a tutorial on the cake. I'm not good at tutorials, but I'll try to give some hints and tell you how I put it together.

Saturday, April 24, 2010

Project #6- and a Happy 30th birthday to my little sis!

So I thought that I was really on the ball, getting this finished a few months ago. Well, I was 90% finished until I noticed on my calendar that her (our) birthday was quickly approaching (our birthdays are a day apart, which has been a lot of fun- we usually shared a birthday cake growing up, and you always know someone is going to remember your birthday! The downside: once my dad brought her a gift on my birthday, and not me, because he had gotten our days mixed up. But I've forgiven him!)
It made me think that I often do that. I get a project almost all the way done, and then I am distracted, put it aside, thinking that I'll get to it soon, and it just sits there...

...and sits there...

...and adds to my pile of unfinished projects.

Does that ever happen to you?

Tell me what helps you to actually finish those projects (without an impending birthday or other deadline!)
As for me? Well, I've decided that it's time to be a 100%-er!

And Happy Birthday Sis. Hope you enjoy your little tote bag! (It's in the mail, if you haven't gotten it yet!)
don't worry, the 30's aren't so bad!

Thursday, April 22, 2010

Find Your Sock Yarn- How to Tackle a Project

Today I was the guest writer over at Find Your Sock Yarn. Be sure to go over and check out my article about how I came to start this blog and take-on my unfinished project list! Then come back and leave me a comment about how you tackle your projects and to-do lists!